Recording vitals
Add vitals like blood pressure, blood glucose, and cholesterol to any encounter or straight onto a patient's profile, or run a Vitals Recording service, and build up their history in one place.
Vitals can be used two ways in Light:
- Ad-hoc – add readings to any encounter or consult, or straight onto a patient's profile.
- As a Vitals Recording service – run a dedicated bookable check (such as a Blood Pressure Check) that captures the vital, your recommendations, and notes, and produces a report.
Either way, every reading is saved against the patient's record, so their history builds up in one place over time.
Available vitals: blood pressure, heart rate, respiratory rate, temperature, SpO2, body weight, height, BMI, waist circumference, body fat, blood glucose, HbA1c, and cholesterol. BMI is calculated automatically from the recorded height and weight.
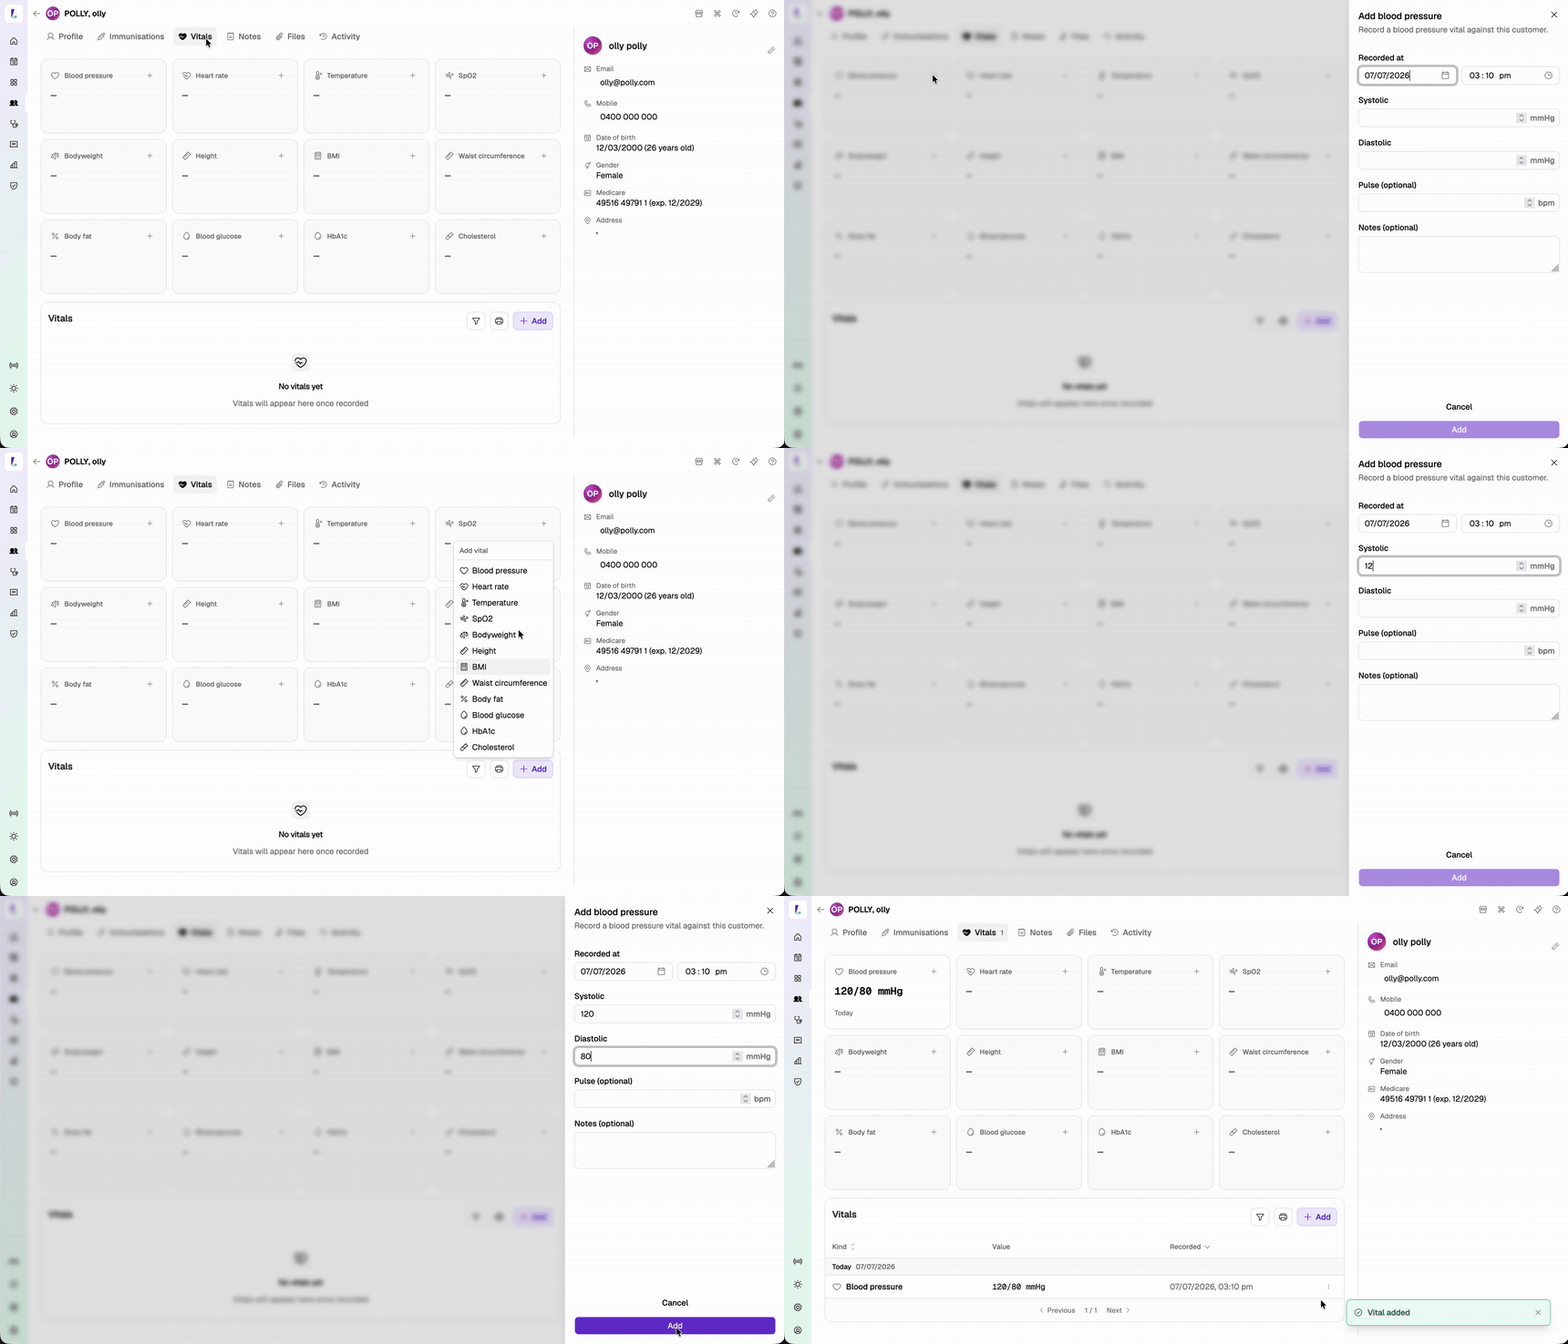
Adding a vital from the patient's profile
- Open the patient's Vitals tab.
- Choose + Add and pick the vital type from the list.
- Enter the value and save.
Adding a vital during an encounter
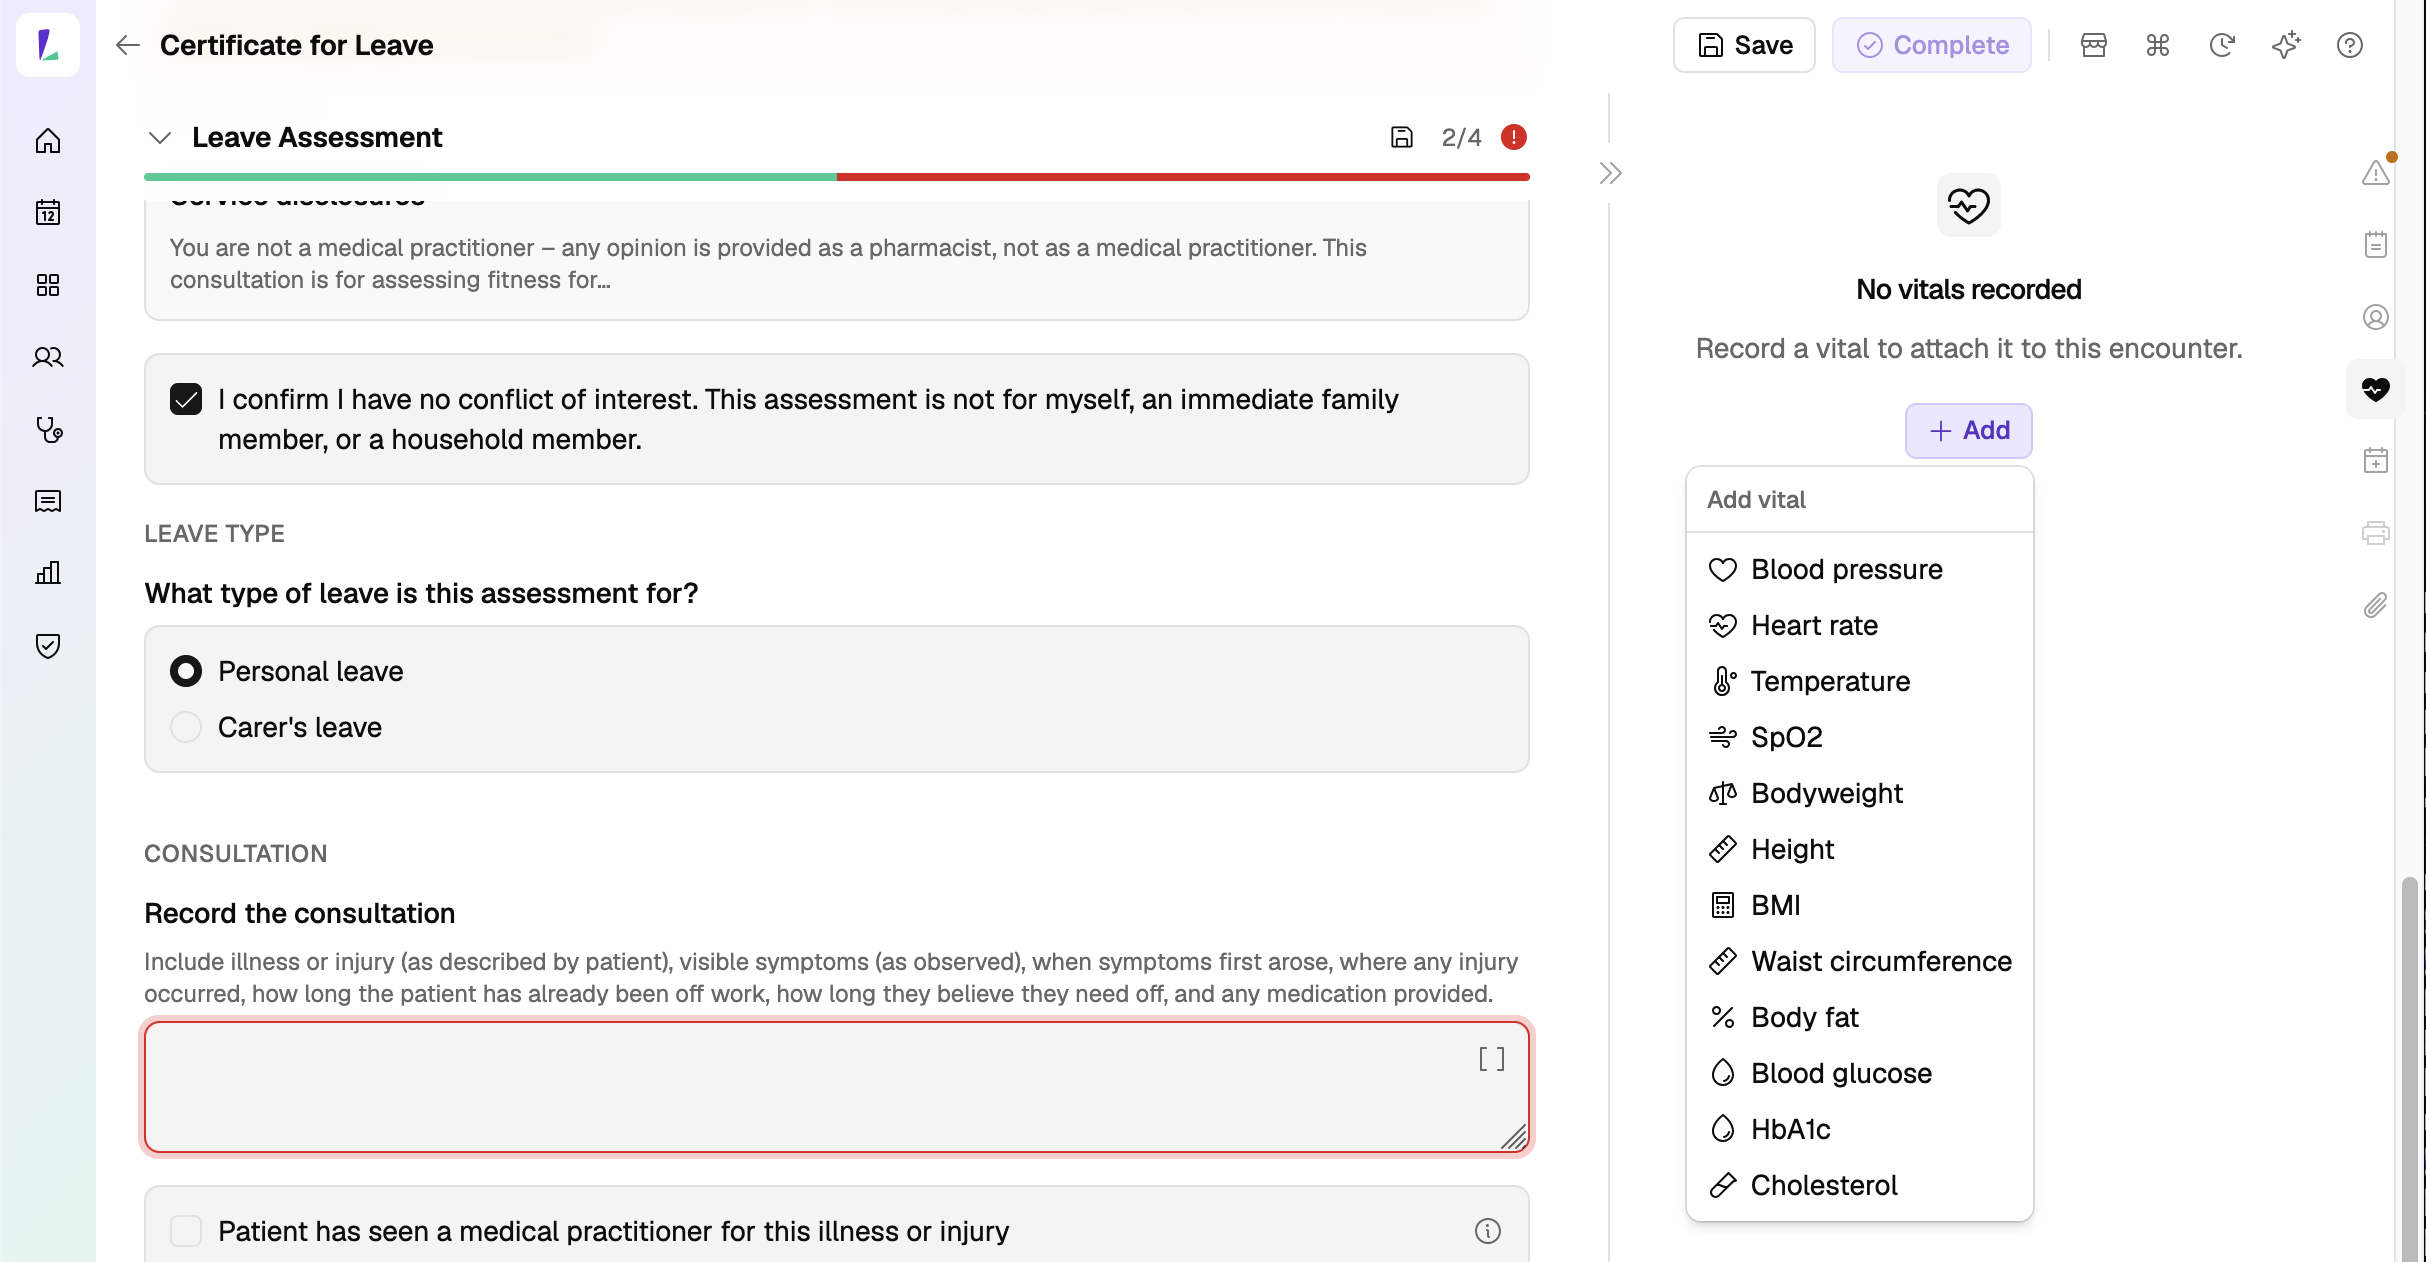
- In the encounter, open the Vitals section from the action panel on the right (the heart icon).
- Choose + Add (or + Add Vital) and pick the vital type from the list.
- Enter the value and save. It attaches to the encounter and records against the patient's profile.
Vitals Recording services
Depending on your configuration, some vitals are available as their own bookable services, each opening a Vitals Recording encounter with the relevant vital ready to complete. For example:
- Blood Cholesterol Check
- Blood Glucose Check
- Blood Pressure Check
- Blood Glucose & Cholesterol Check
- HbA1c Test
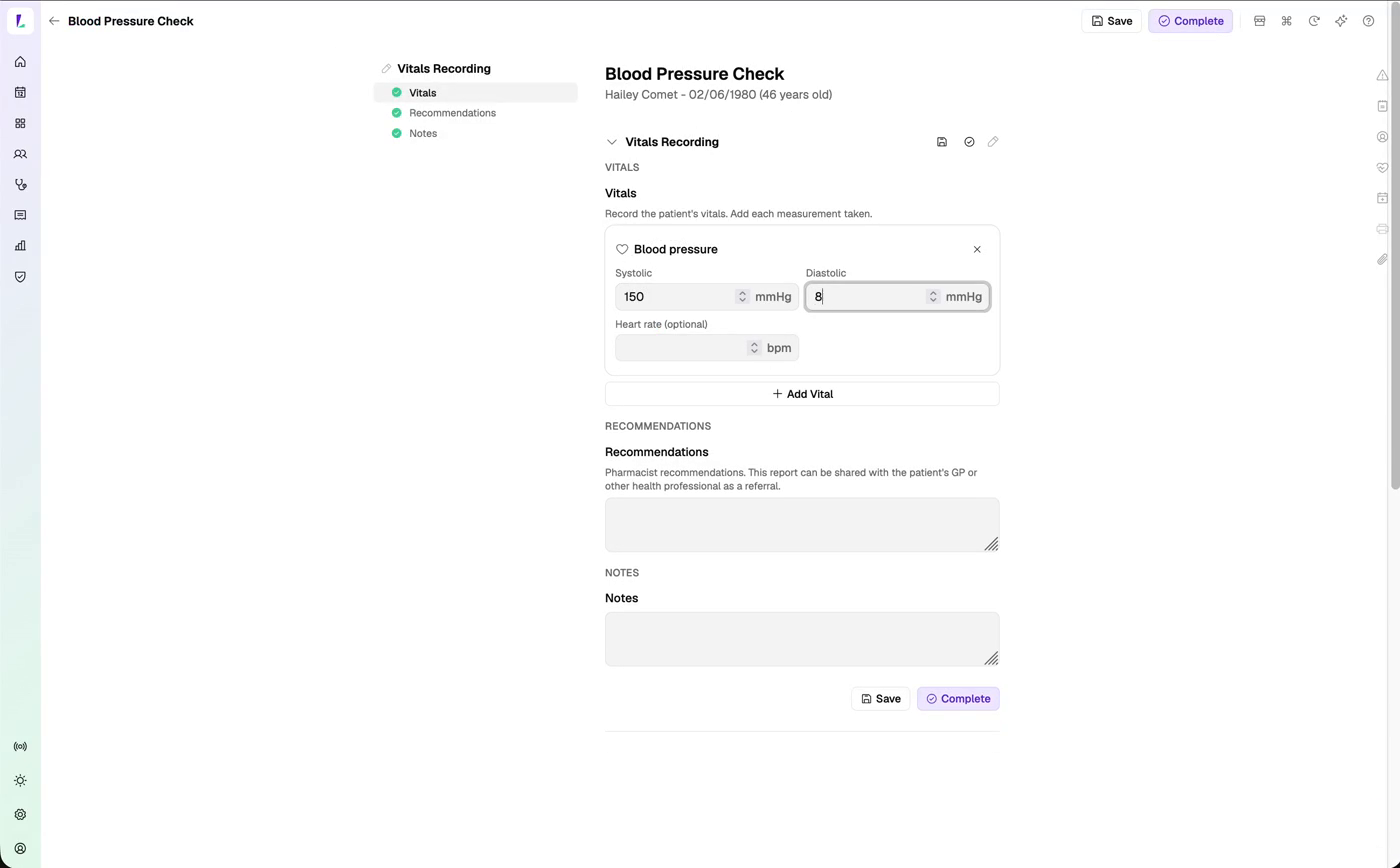
- Add the service. Create the service (for example, Blood Pressure Check) for the customer.
- Record the vital. The mapped vital is already set up in the encounter – record it. You can add any other vitals taken during the visit with + Add Vital.
- Add recommendations and notes. Recommendations print on the report and can be shared with the patient's GP or another health professional as a referral. Notes are optional and don't appear on the report.
- Complete the encounter. Choose Complete to finish and save the vitals to the patient's record.
- Print the report. Tap the printer icon in the encounter, or open the three-dot menu next to the encounter on the service page. The report prints on your pharmacy letterhead with the recorded vitals and your recommendations.
Editing or adding to existing values
- Add another reading: to record a new value for a vital that already has entries, just add it as above. Each reading is kept, so the history builds over time.
- Edit or correct a value: open the three-dot menu next to the entry in the history to edit or remove it.
- Edit a reading recorded in an encounter: open View encounter from the entry to open that encounter and edit the values there.
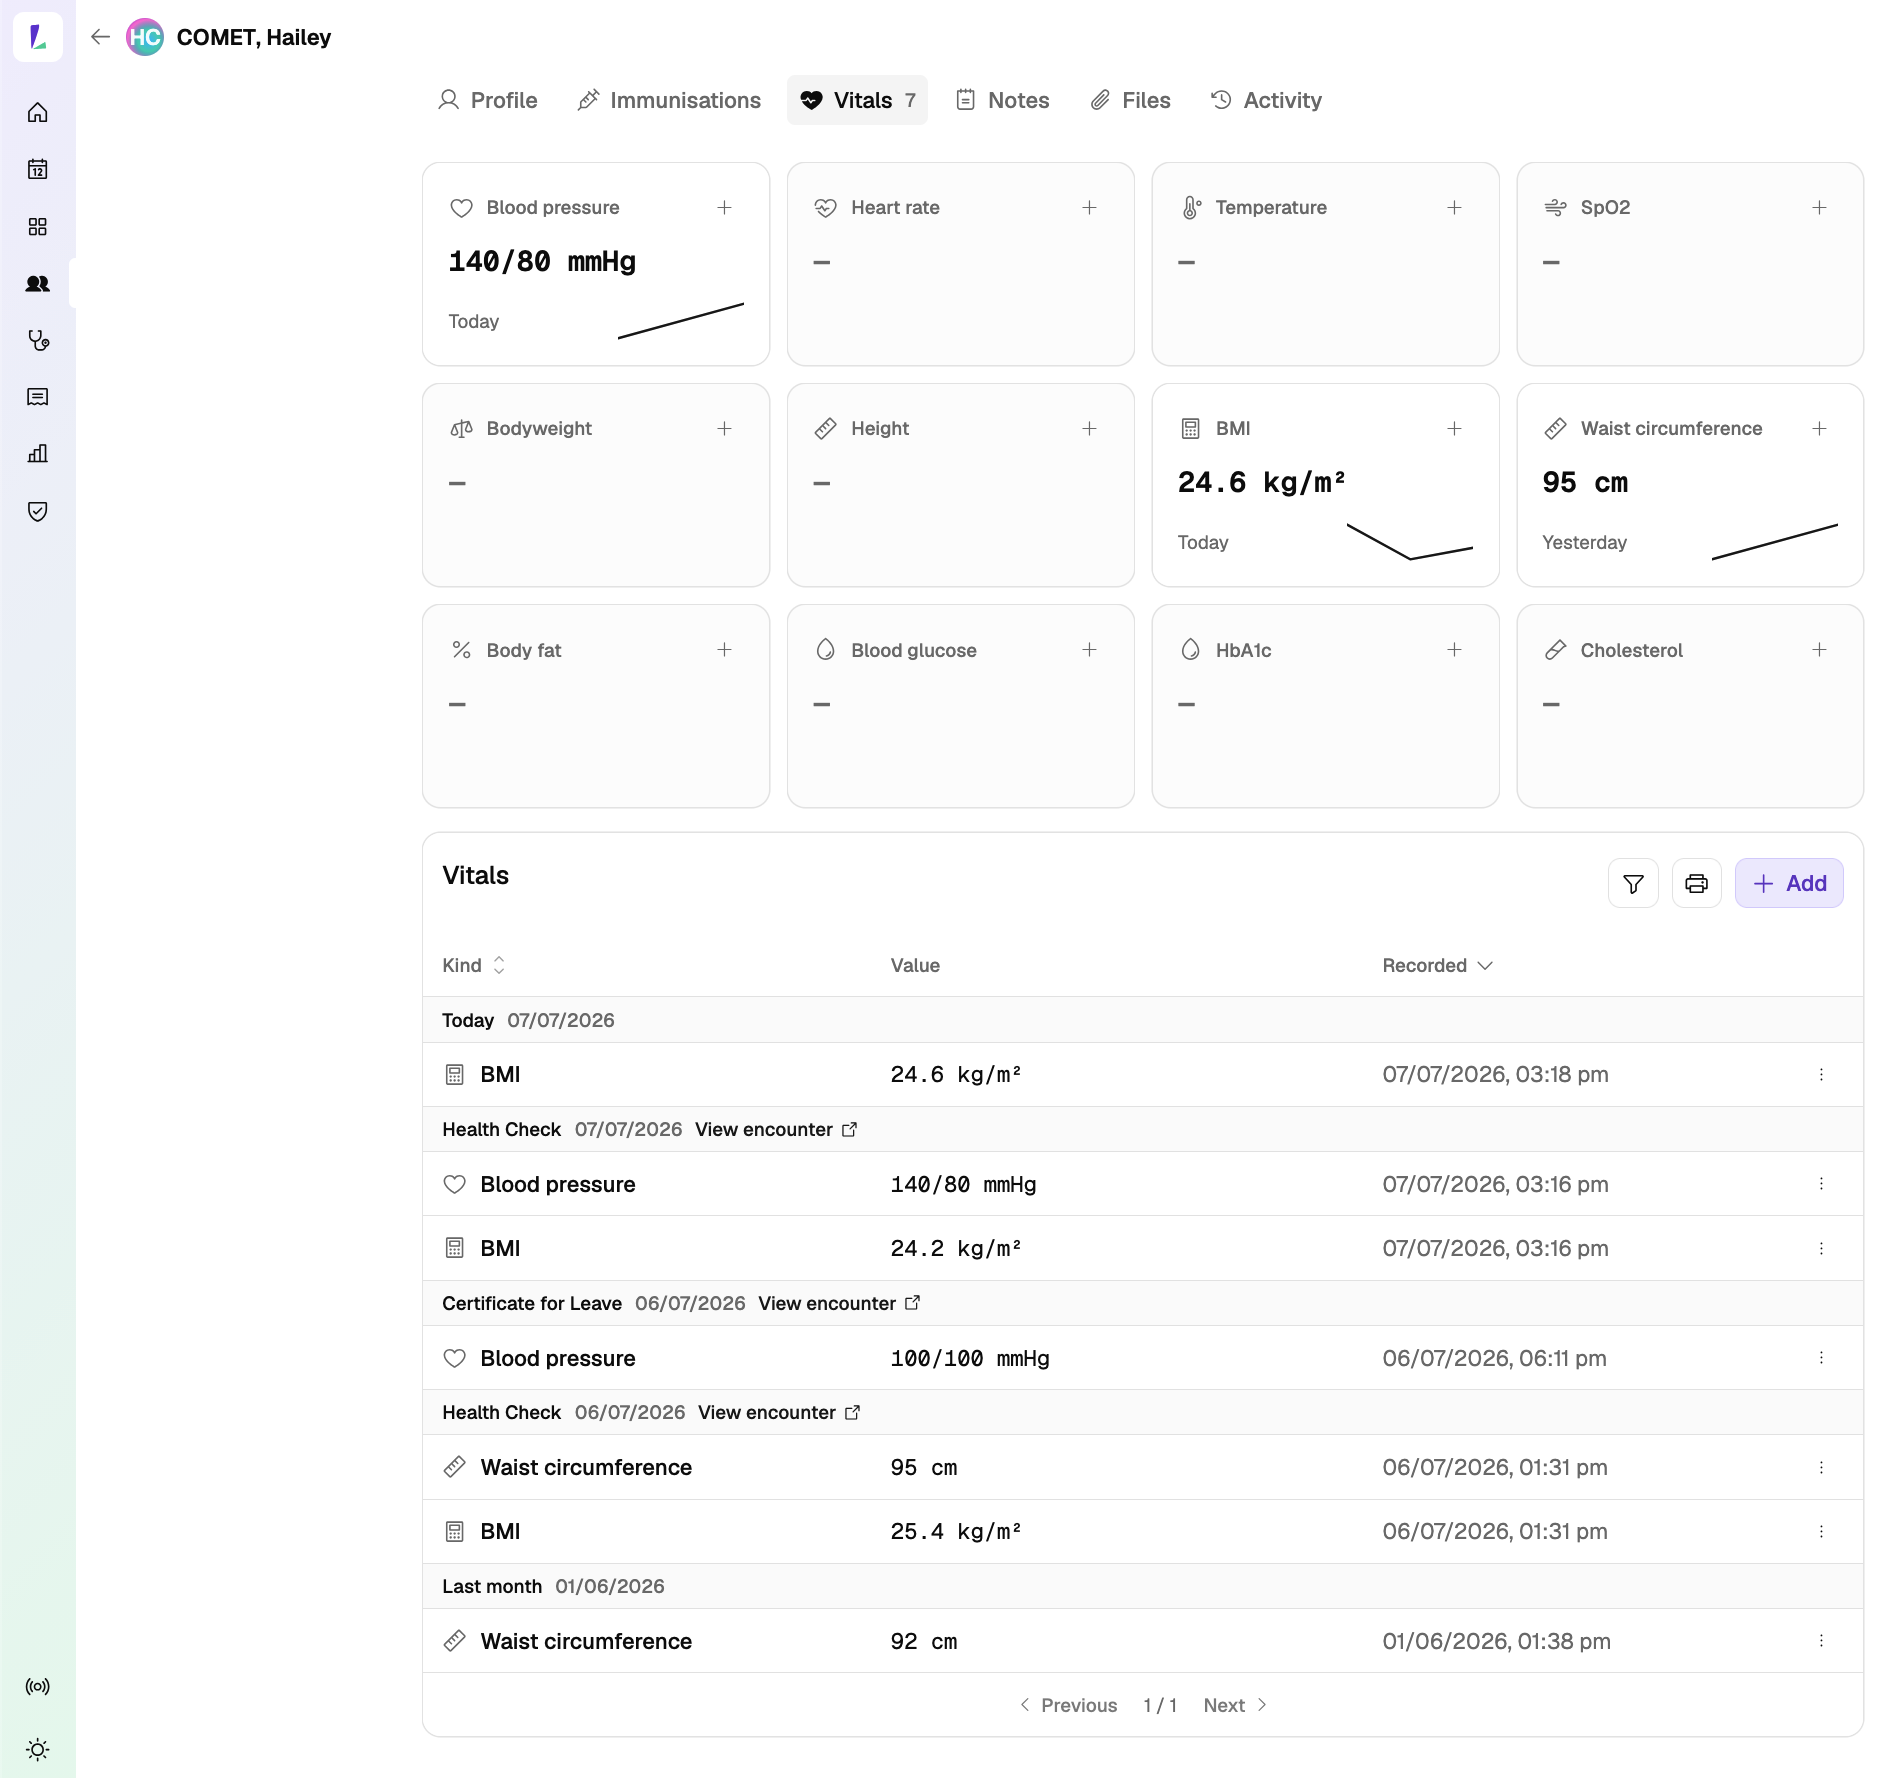
Editing vitals within an encounter
When you add or change vitals as part of an encounter, you must Complete the encounter for the vitals record to be updated. Until it's completed, the changes won't be saved to the patient's record.
Viewing a patient's vitals
On the patient's Vitals tab, each type shows its latest value and when it was taken. The full history is listed below, with the value and when it was recorded. The count on the Vitals tab is the number of distinct vital types recorded – for example, three blood pressure readings and one BMI count as two.
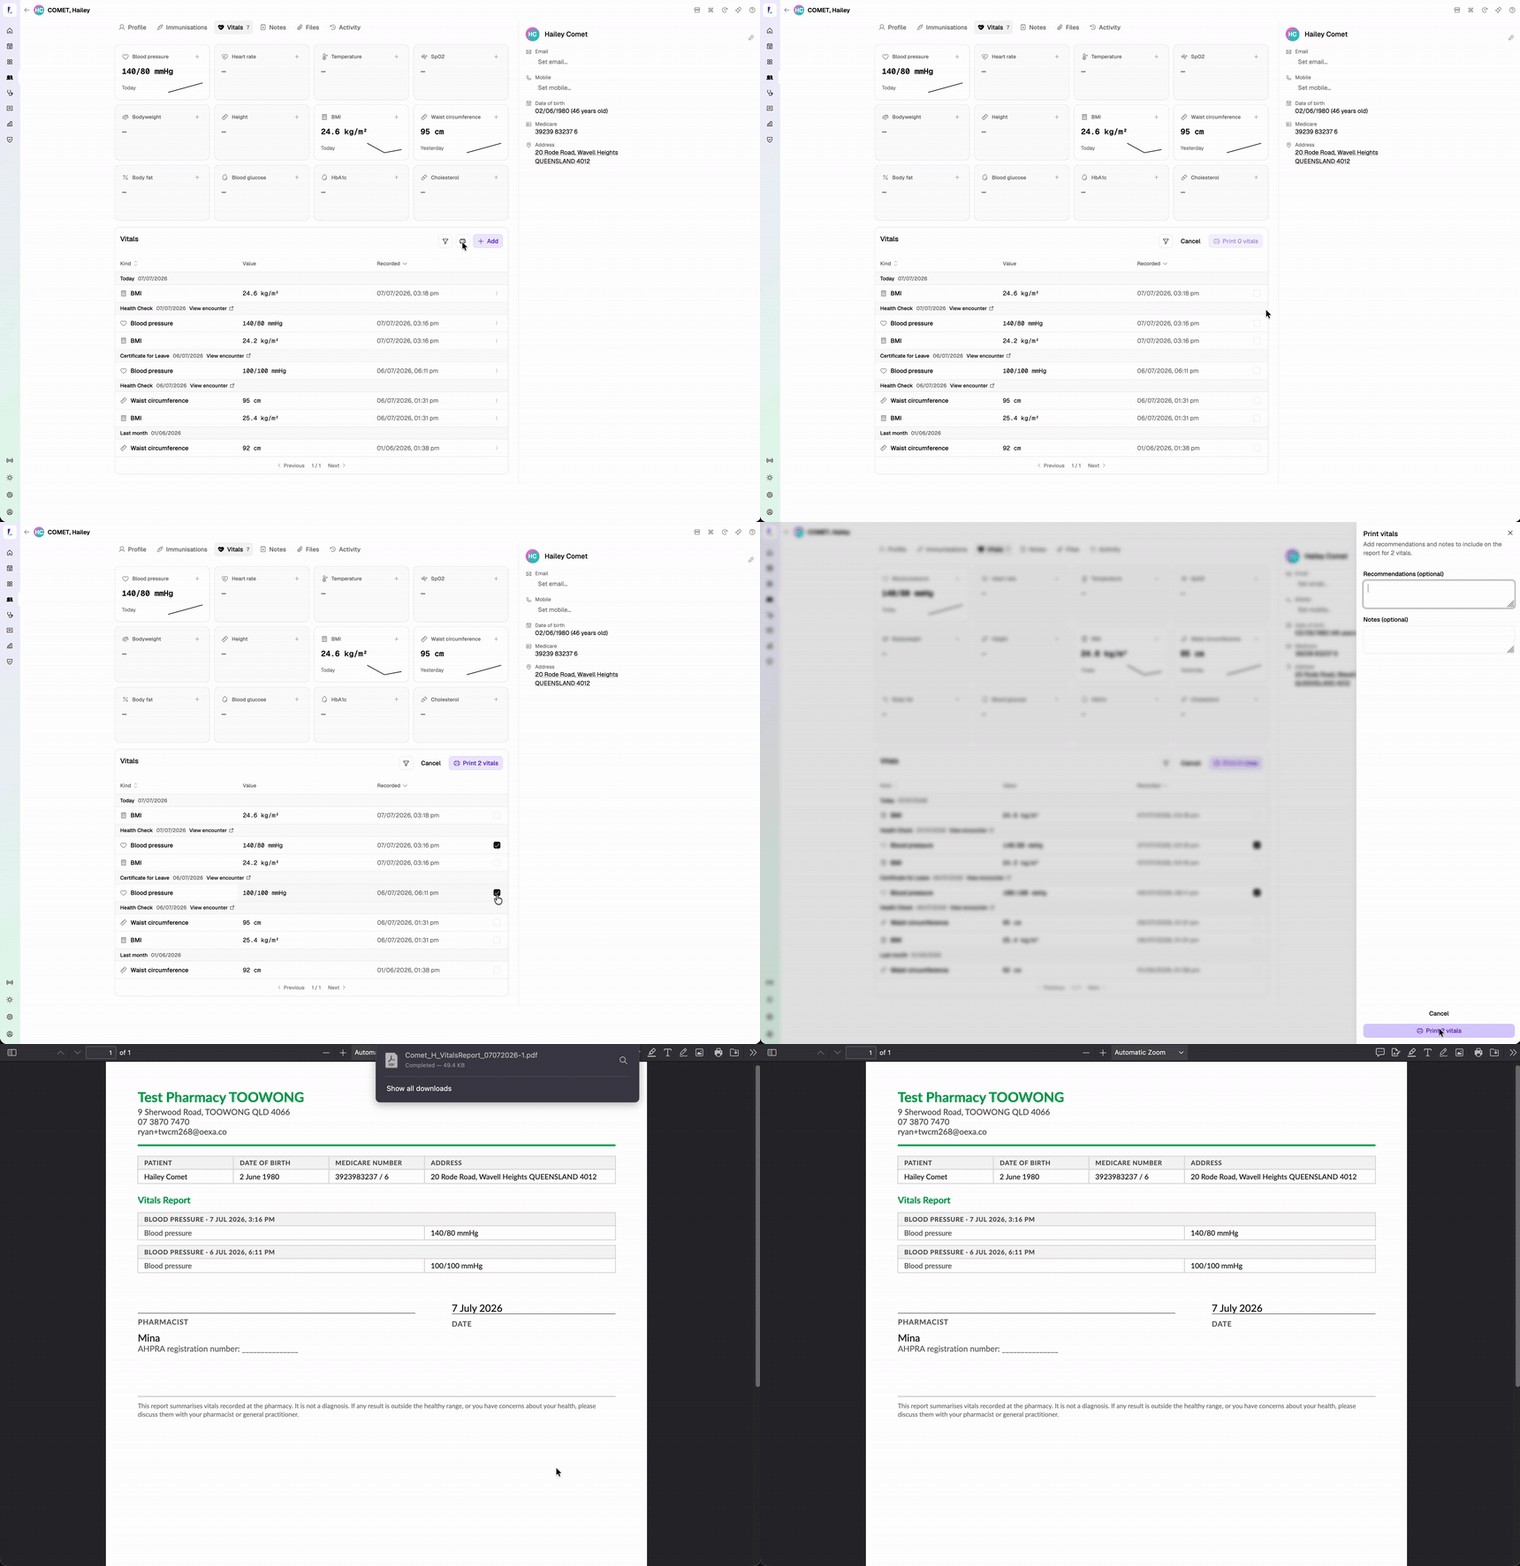
Printing vitals from the profile
You can print a patient's vitals from their Vitals tab – useful for sharing readings taken over time.
- In the vitals history, choose the Print icon.
- Tick the readings you want to include. You can select across different dates to show how a vital has changed over time.
- Add any recommendations and notes to include on the report (optional).
The report lists the selected readings on your pharmacy letterhead.
A note on input limits
Vitals have only light input limits, so most values you enter will be accepted. They aren't a clinical check on the reading – it's worth glancing over what you've entered before saving.