Connecting Healthcare Identifiers
Link Oexa as your pharmacy's CSP in HPOS, then connect the site HPI-O in Light.
Connect Healthcare Identifiers so Light can look up and maintain patients' IHIs. Setup has two parts: link Oexa to your organisation in HPOS, then validate and save your site's HPI-O in Light.
Healthcare Identifiers is feature flagged and switched on for pilot stores only. To find out more or request access, contact Support.
Before you start
You'll need:
- an organisation registered with the HI Service and an active HPI-O
- the organisation's HPI-O linked to the Organisation Maintenance Officer's individual PRODA account
- an Organisation Maintenance Officer who can manage the organisation in HPOS
- owner or admin access in Light
Link Oexa in HPOS
- Open the organisation in HPOS
Sign in to your individual PRODA account and open HPOS. Select Proceed as individual only, then go to My programs›Healthcare Identifiers and My Health Record. Select Healthcare Identifiers – Manage existing Records.
Open My organisation details. If you manage more than one organisation, select the pharmacy you are connecting.
- Open the CSP links
Open the CSP Links tab and select Manage CSP links.
- Link Oexa
In Light, go to Settings›Integrations and open Healthcare Identifiers. Copy the CSP registration number, then enter it in HPOS. Select Oexa from the results and confirm the link.
For screenshots and more detail, see the Australian Digital Health Agency's Contracted Service Provider linking in HPOS guide. Complete Step 1 of that guide for Healthcare Identifiers. Step 2 is a separate My Health Record authorisation link.
Connect the site HPI-O in Light
- Open Healthcare Identifiers
Go to Settings›Integrations. On the Healthcare Identifiers card, tap Get Started or Set HPIO. If the site already has an HPI-O configured, tap Manage.
- Check the site details
Check the pharmacy name and address shown in the sheet. These details come from the site profile and can't be changed here. Contact Support if they are incorrect.
- Validate the site HPI-O
Enter the Site HPIO and tap Validate. Light checks it with the HI Service and shows its current status.
If the HI Service returns a different current number in place of the one you entered, Light shows the resolved HPI-O for you to save.
- Save
After validation succeeds, tap Save to connect the HPI-O to the site.
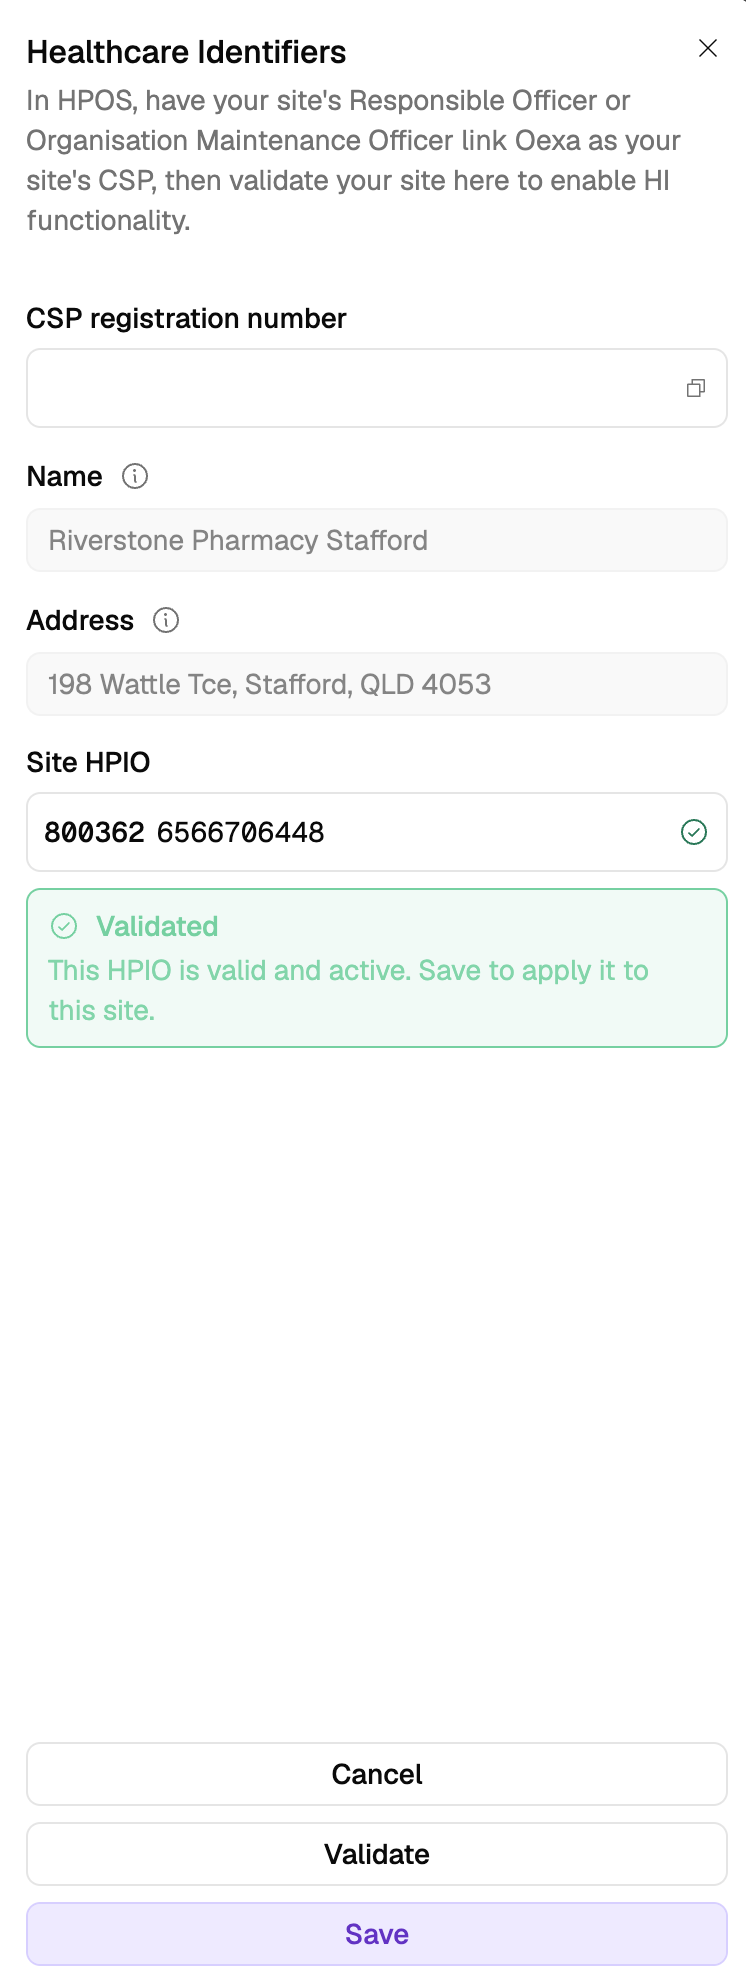
After validation succeeds, save the HPI-O to connect it to the site.
Bright idea
The HPI-O, HPI-I and IHI fields show their fixed six-digit prefix separately. You can still paste the full 16-digit number. Light recognises the prefix and fills the remaining 10 digits.
If validation says Oexa isn't authorised to act for the HPI-O, confirm that the correct pharmacy linked Oexa as its CSP in HPOS, then try again.
The card shows the HPIO, Status and Last Validated. When the status becomes Stale, open Manage and tap Revalidate to confirm the number is still current.
Next step: add HPI-Is where needed
The site connection doesn't require team members' HPI-Is. Add an HPI-I after connecting the site where a provider needs a validated HPI-I, such as for certain expanded or full scope services.
- Open the team member
Open your team list and select Edit User on the team member.
- Look up the number
Select Add HPII, enter the HPII Number, and select Look up. Light checks the number against the team member's name with the HI Service.
- Save
When the number comes back active, select Save HPII.
If no HPI-I matches, check the name on the user record and the number, then try again.